Welcome to my crafty blog... a "garden" of colourful cards, quilting, sewing projects, knitting...and what ever else happens along the way!!


Wednesday, January 25, 2012

Papertrey Ink January 2012 Blog Hop


This month, in honor of the new year, Papertrey Ink has challenged us to pick a 
favorite project from 2011 and share it!  To take it a step further, we were to create 
a second card that is inspired by the selected "favorite project".  The new version 
of an old favorite could carry over the color scheme, the layout or the stamp sets.
 
When I received my order for Stitches and Swirls and the Bloom Builder #3 I knew I wanted to create a card with both of these items. I made this card in December 2011 and it quickly became one of my favorites of the year. The full post can be found here. The cranberry, cream and tea dye duo colour scheme seemed to suit the holiday season.


Here is another version of this card using a different colour scheme ...... something a little brighter as a birthday card for my sister-in-law. 

Blue is a her favourite colour, so I created the lower plaid pattern (Waltzingmouse Stamps) with Dutch Blue and Bamboo inks from Close to My Heart. The Stitches and Swirls images were stamped with Bamboo ink and then the same ink was sponged on the edges of the card. The blue grosgrain ribbon from my stash was a perfect match to the blue ink. The sentiment,  from Mega Mixed Messages, was also stamped with Dutch Blue ink.

I couldn't find a blue card stock in my stash that matched the ink and ribbon... the one I finally chose for the Bloom Builder, was a lighter blue, so I stamped all of the petals with Dutch Blue using Text Style.  I stamped a piece of  Vintage Cream card stock with Polka Dot Basics and Bamboo ink.

Here are some of the layers of 'petals' after stamping, die cutting and sponging the edges. You can see the lighter blue card stock and the effect of stamping in the darker blue. It created just the right colour match to the ribbon and a little extra texture detail on the blooms as well!
The beige polka dot 'flower'  (above left) was cut using Stampin'Up  Daisy #2 die and then placed under the blue blossom.  It created another layer and coordinates with the Bamboo ink and the button and embroidery floss.

Here's a close up of the final bloom .... I love the fullness that you can achieve when 10 layers of card stock are used.   I think I may have to make this again using pinks .... and peachy tones ..... and lemon yellows ..... and violets ...
I think I will just have to create a whole rainbow of coloured Blooms!!
Can you tell that this is one of my favourite designs ? !!


The inside of the card uses another image from the Stitches and Swirls set and a sentiment from Daydreamer. I stamped the flower and leaf image in Bamboo ink and then went back over the flower with a blue marker to get the two colour effect. It was fast and easy and added a little something extra to the inside.


Card Details:
Stamps-  PTI: Stitches and Swirls. Mega Mixed Messages, Text Style, Polka Dot Basics, Daydreamer;  
Waltzingmouse: Off Beat Backgrounds
Inks-  CTMH Bamboo, Dutch Blue
Paper-  PTI Vintage Cream; blue card stock from my scrap stash.
Dies-  PTI: Bloom Builder #3;   Stampin' Up  Flower: Daisies #2 die
Other Supplies-  blue grosgrain ribbon; PTI Lemon Tart button, embroidery floss; blue marker

Thanks for visiting today. Enjoy the rest of the Papertrey Ink Blog Hop.
Karen C. 

Saturday, January 21, 2012

January Birthday Wishes!!

Happy 2012 !!
I've been absent from my blog for almost a month, but I'm finally back for another year of sharing cards and projects that I enjoy making for family and friends!!  We still have a Christmas wreath hanging over our fireplace, but all 
of the other festive decorations have been tucked away until next December!!

This month I haven't spent much time in my craft room at all.  I was 
diagnosed with Inflammatory Arthritis in November and it has affected my 
shoulders, wrists and hands, making paper crafting and sewing a challenge.
My doctor has prescribed medications, rehab and exercise, so  I'm hoping 
that I can enjoy some of the things that I love to do, as I start to feel better. 
It may be that it will take me longer to finish projects .... and I won't post as often, 
but I will continue to work on card making and sewing projects  whenever I can.

So ... without further ado ... here is my first post for the New Year ....
a birthday card for my sweet 3 year old grand niece. Little girls love dress up and  princesses, so Everyday Princess from Stamping Bella with lots of pink, was a fun place to start !!  
Papertrey Ink's Quatrefoil Cover Plate is such a great way to add interest and detail as the background. Add some sentiments in the spaces and the card is almost done!!  A small image from Mehndi Medallion was also used in the cut outs along the edge of the cover plate. Love it!!

The flower accent was coloured with a copic marker and the button was die cut with felt.

Card Front:
Stamps:  PTI Tiny Tags and Tiny Tags II. Mehndi Medallion;   Stamping Bella: Everyday Princess
Inks:  Memento Tuxedo Black;  CTMH Hollyhock
Papers:  PTI Stamper's Select White; Raspberry Fizz
Dies:  PTI Cover Plate Quatrefoil;   Button-Up #2; Nestabilites: Label #4
Other Supplies:  Copic markers; PTI Raspberry Fizz Felt; Prima flower and beige embroidery floss; 
Kaisercraft 'Lippy Red' rhinestone; Sakura Gelly Roll Silver glitter pen.

I always use PTI's Big Birthday Wishes stamp set and By the Numbers dies to celebrate children's birthdays.... little ones love to see their ages in print!!


Card Interior:
Stamps:  PTI Big Birthday Wishes;   Waltzingmouse: Off Beat Backgrounds
Inks:  CTMH Sweet Leaf, Hollyhock  
Dies:  PTI  By the Numbers

Thanks for visiting today. Have a great week-end.
I have a few more January birthday cards to share, so will try to be back soon!!
Karen C.

Friday, December 23, 2011

A Christmas Wrap-Up

Hope everyone had a great Christmas week-end. My youngest son arrived
from the East Coast on the 19th so we had a wonderful family celebration.
New Year's Eve is just a few days away - soon all of the Christmas stamps,
dies, punches and decorations will be tucked away for another year.

Alert:  This is a very loooong post with lots of pictures!!

I have quite a few projects to share today since I haven't updated my blog
for a while. It's  "A Christmas Wrap-Up"  with some of the cards, tags and packaging that were included in our Christmas celebrations this year.
I love the stamps, dies and accessories from Papertrey Ink, and the holiday season certainly gives me a chance to play with all the things I've 'collected'.

Tags and Packaging
I loved using this festive paper for the little gifts I sent 
my grand nieces and nephews and decided to make 
matching tags with a similar design and colour scheme.

PTI's Tag Sale Die #3 was cut from Pure Poppy card stock and then layered with a white Doily Detail die cut. Winter Penguin was stamped with Memento Tuxedo Black ink and coloured with copic markers. The little bow around the penguin's neck is from the new Tiny Tags II set. Finally, a 'flurry' of green snowflakes were stamped around the penguin.

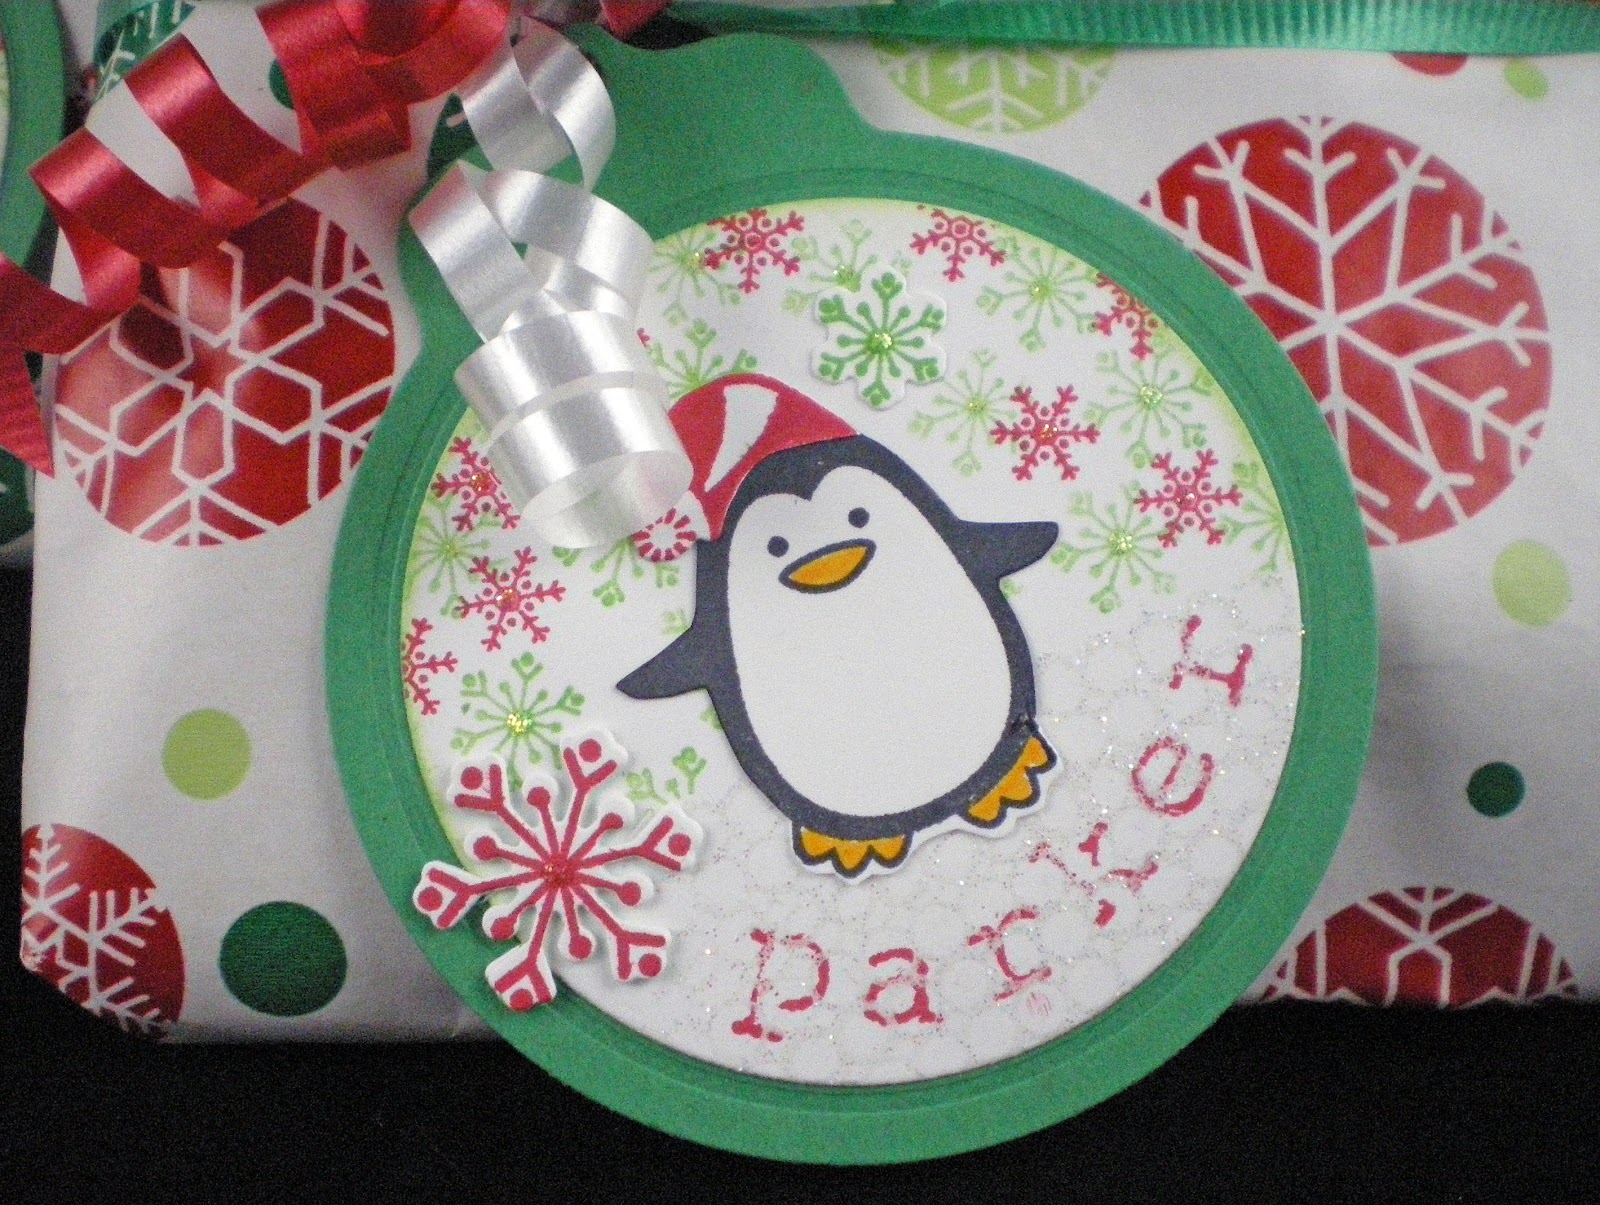
For these parcels I used a lot of the same details as 
above, but stamped the images onto the matching 
die cuts and then added them to a 2 1/2" circle.

Red and green snowflakes were stamped around the penguin and the 
larger snowflake die cut (from Winter Penguin) was added to one side. 

I heat embossed a strip of Background Basics: Circles 
with clear embossing powder to create an 'icy' effect 
on the lower half of the tag. Finally the names were 
added with  Stampin' Up's Rough Type. Stamping on 
top of the embossed circles gave an unexpected result!!


A Little Penguin Treat
This parcel has two tags attached to the front: one using Mat Stack #2 
and the matching stamp set (Mat Stack 2 Collection), and one using the  
Seed Packet Die. The penguin is from Tiny Treats: Christmas. The seed 
packet was stamped with the various snowflakes from Winter Penguin 
and a sentiment from the stamp set: Yummy (Stampin' Up)


A Snowman Set
I have one grand niece who loves snowmen, even though she lives 
in New Zealand and hasn't experienced the 'real thing' yet. 
I purchased a book about snowmen and then I made her a large 
Snowman tag, a little "Build a Snowman" kit and wrapping paper 
for her Christmas gift.  Here's everything all wrapped and ready to mail.

The wrapping paper was made with 11" x 17" white paper and LOTS of stamping!! The circle snowflake from Tag-Its #8 was stamped all over and
then the snowman and mittens from Tiny Treats: Christmas and sentiments
from Winter Penguin were added inside the circles.  A circle snowflake
stamp from this set filled in the spaces between the larger snowflakes.

I die cut and stamped three snowman and accessories  
(Shape-Up Snowman) 
 in order to make the tag and the little "Build a Snowman" kit.

I packaged two of the snowmen and accessories  in a cellophane bag.

The final snowman was used to create the tag. I layered a blue patterned paper onto white card stock as the base of the tag. The snowman and accessories, along with lots of die cut snowflakes were added to the tag. I made the snowman's scarf using several lengths of Pure Poppy Baker's Twine. The sentiment was created by stamping 'let it' and adding 'snow' using the Block Alphabet die cut letters in Pure Poppy.
This is what I added to the back of all the tags. 
I think the tags would look cute hanging on the Christmas 
tree in years ahead; a little reminder of Christmas 2011.


Holiday Travel
It was so great to have my youngest son home for a week. We just don't get to see him very often, so we made the most of every minute.  One of his gifts was a ticket to Vancouver to visit his girlfriend for part of the holiday season and New Year's Eve. I created this tag and wrapping for his tickets. Some leftover white tissue paper was stamped with the string of lights from Holiday Lights.

The tag was made using Mat Stack #2, the stamped frame from Tag-Its #9 ; the sentiment from Tiny Tags II and the airplane image from Tiny Treats: Valentine.


Card
While my son was here he asked me to make a card for his girlfriend. He looked through all of my stamps and accessories and chose the colours and design for this sweet card. The little princess was coloured with copic markers and the little berries add some glitter to the holly leaves.
 
Main Stamp: Everyday Princess (Stamping Bella)
Small Sentiments: Tiny Tags and Tiny Tags II
Dies:  Nestabilities Label #4; Holly Jolly; Quatrefoil Cover Plate.


Gift Card Holder
Here's a combination card, gift card holder and 'recipe' for Snowman Soup. This was a great stocking stuffer along with a gift card to a favourite coffee shop and a little package of hot chocolate with marshmallows and a candy cane. The card stock is Polar Expressions * Comfy Cozy - a two sided patterned paper from Imaginisce.  The Friendship Jar and  Friendship Jar Holiday Fillers was a great match for this paper. 

I used the red side as the main card base and then added the pale blue snowflake paper as the mat for the jar of "hot chocolate, marshmallows and snowman".  The marshmallows and the snowman's pom pom were covered in Stickles to create lots of glitter. Pure Poppy Baker's Twine wraps around the jar lid and attaches the little tag. In order to make the tag, I printed "Snowman Soup" on my computer with blue ink and then stamped the 5c and the tag outline before hand cutting it.

Inside I used more of the red patterned paper to create a gift card holder on one side. I used my 1 3/4" scallop punch to create the opening at the edge. On the opposite side I attached the recipe for Snowman Soup, along with some stamped snowflakes and the little cup image from Tiny Treats:Christmas.

So ... that "wraps up" all of my Christmas projects for 2011 !!

Thanks for taking time to visit with me today. 
Best Wishes to you for a great 2012!!
I'll be back in January with some birthday cards and projects. 

Karen C. 

Wednesday, December 14, 2011

Holiday Lights: The Sequel

The Hoilday Lights Christmas stamp set has fun images and sentiments. I made this one a few weeks ago that used red and yellow embossed 'ligt bulbs', but I wanted to try a different design. I just received  Holiday Photo Finishers in my most recent order from Papertrey Ink, so added the large round tag to the upper corner. The tag was stamped in PTI Pure Poppy ink and then overstamped with the snowflake flourish from Tag-Its #8, with Bamboo ink. A green marker outlines the red circle image.   It's a very festive look and an easy design for mailing!!


Here's the inside of the card, using another string of lights and the 'twinkle' sentiment from Tag Its #8.


Card Details:
Stamps:  PTI Holiday Lights, Holiday Photo Finishers, Tag-Its #8
Inks:  PTI Pure Poppy;  CTMH Clover Meadow, Bamboo, Sunny Yellow, Crystal Blue;   Memento Tuxedo Black
Paper:  PTI Stamper's Select White.
Other Supplies:  green marker; Sakura Clear glitter pen.

Thanks for visiting today.
Karen C.

Monday, December 12, 2011

Many Thanks

I needed a thank you card last week and decided to use some stamp sets that I just received..
The Bloom Builders #3 die was also in my most recent order from Papertrey Ink. I had made a flower with cranberry card stock to 'test out' the die and it was sitting on my desk .... so I used it as the starting point for this card. 
10 layers of cardstock  (2 of each of the 5 sizes of petals) were layered to create a very thick and fluffy flower. I then added a beige button and embroidery floss to the center to hold them all together.

 Heather Nichols used Vintage Touch Tea Dye Duo with the Stitches and Swirls stamp set for this card. I thought the combination of cranberry and Chai inks would create a really warm and rich look, so I used her card as an inspiration.
I wanted a ribbon across the middle of the card, so decided to create a plaid effect on the bottom portion of the card using Waltzingmouse Stamp's Off Beat Background.  The sentiment is from Fillable Frames #1 .


In order to make the flower 'pop' I ended up layering it over a beige circle  
(from one of the Limitless Layers 1 3/4" Circles) and a single green flower that I cut from  Stampin'Up's Daisies #2 die. I really like how the green flower looks like a set of leaves around the cranberry bloom.

Here's how I created the layered effect with various dies ............
Stampin'Up :  I cut all three flowers from the die, but used the middle size for this project.
Limitless Layers:   I used one of the 1 3/4" circles from the Limitless Layers die collection. Here's the metal die and the 2 card stock die cuts, before they were assembled.

The 'petal points' of the green flower fit perfectly 
in between the points of the Limitless Layers.
You can see the green and beige just peeking out from under the 
cranberry flower. It adds just the right touch of contrast and interest.


Card Details:
Stamps:  PTI Stitches & Swirls, Fillable Frames #1 ;   Waltzingmouse Stamps Off Beat Backgrounds .
Inks: Vintage Touch Tea Dye Duo; Close to My Heart Cranberry .
PapersPTI Rustic white; ColorMates Light Coffee beige; cranberry and green from my stash
Dies: Bloom Builder's #3; Limitless Layers 1 3/4" Circles;   Stampin'Up Daisies #2 die .
Other Supplies: Cranberry satin ribbon, beige button, beige embroidery floss .

Friday, December 9, 2011

Red or Blue Snowflakes?

Just a quick post today. 
I've been finishing up Christmas cards and letters so I can get them into the mail this week-end. I first saw Tammy's card  during Papertrey Ink's November Blog Hop and then Stephanie's interpretation of that card here

My first card uses all the same elements ... white card stock with red snowflakes and PTI's Quatrefoil Cover Plate. Tea for Two's label was die cut and then the corresponding stamp was selectively inked so that only the border is visible. Red brads were added on either side of the sentiment (from 2010 Holiday Tags) Finally, the label was added to the card with dimensionals.


The second card uses a combination of Rustic White card stock, light blue Quatrefoil Cover Plate, Close to My Heart Twilight (blue) snowflakes.


Thanks for visiting today.
Karen C.

Monday, December 5, 2011

Love Lives Here: Trees

I've been having lots of fun using my stamps and dies from the Love Lives Here: Holiday set. I made two cards using the tree images using a non-traditional colour scheme of green, aqua and chocolate!!


The first one uses the three part die and matching stamp set to create a single tree for the focal point. The green oval was embossed with a polka dot folder and then stickles were added to each dot. The oval was matted with an aqua oval and the added to the white card base. Polka Dot Basics was used on the card front with SU Pool Party ink; the outer edges were sponged with Vintage Tea Dye Duo.
The sentiment, from Love Lives Here: Holiday was stamped with Sweet Leaf ink onto an Angled Die that was stamped with the border from Label Basics.

The inside of the card was stamped with the sentiment, pine boughs and stars from Love Lives Here: Holiday.


The second card uses three different papers from PTI's Green Boutique paper pack and the three part die to create a trio of  trees. The little jeweled stars were added to the top of each.
The white background panel was stamped with Pool Party ink using the Woodgrain stamp set and then added to an Aqua Mist card base. A brown marker was used to outline the white panel and create some contrast between the focal panel and the card base. The sentiment, from Holiday Lights, was stamped in Chocolate ink.


The inside sentiment (from Holiday Lights) was stamped with chocolate ink and then accented with a yellow die cut star.

Single Tree Card Details:
Stamps:  Love Lives Here: Holiday; Label Basics; Polka Dot Basics; Text Style
Inks:  SU Pool Party; Close to My Heart: Chocolate, Sweet Leaf, Sunny Yellow; PTI Vintage Toch Tea Dye Duo
Papers:  SU Pool Party, Certainly Celery; PTI Stamper's Select White
Dies:  Label Basics: Angled Dies; Love Lives Here: Holiday
Other Supplies:  Creative Memories Oval Cutting system; EK Success small star punch; Cuttlebug Polka Dot Embossing Folder; Stickles: Diamond

Trio of Tree Card Details:
Stamps:  Love Lives Here: Holiday; Holiday Lights; Background Basics: Wood grain
Inks:  SU Pool Party; Memento Rich Cocoa; Close to My Heart: Goldrush
Papers:  PTI Aqua Mist, Stamper's Select White; Green Boutique Paper pad.
Dies:  Love Lives Here: Holiday Collection
Other Supplies:  White Blossom Jewel Stickers; brown marker.

Thanks for visiting today.
Karen C.