Welcome to my crafty blog... a "garden" of colourful cards, quilting, sewing projects, knitting...and what ever else happens along the way!!


Showing posts with label Wedding. Show all posts

Thursday, September 1, 2016

Fabric Projects for the Wedding

Lea and Ian invited family and friends to their wedding and reception. 
Since there were so many little ones at the wedding, 
Lea wanted something to entertain them throughout the evening. 
I made 16 Art Folders, using the royal blue colour for the 
main body of the art folders and accenting with a 
colourful print trim and flap. Each child had their name 
added to the front of the folder using 
Papertrey Ink's Polka Dot Alphabet Die Collection
I used Heat'n Bond applied to the back of white cotton, 
so the names could be easily attached with a hot iron!
A tall stack of Art Folders
A few finished folders with names added.
Inside of the art Folders, with a pocket for 
colouring pages and slots for a variety of crayons.

The Art Folders were placed at the tables, 
ready for the little ones.


There were also 9 infants at the wedding, 
so I used the same fabrics to make bibs for them.
One side was made with the colourful print and 
the other side with a solid blue fabric.
5 Bibs with this combination:
Variation #1

As I started to run out of large pieces of fabric 
I made a few variations with bits and pieces!
Variation #2

Each infant had a bib and a little package of 
teething toys on the table. A small name tag was attached.
Papertrey Ink: Tremendous Tags die
My Favorite Things: Document It - December (circle frame)
Variation #3
I still needed a few more bibs, so I used a blue fabric for the front, 
terry cloth for the back and added an appliqued bow tie for 2 of the boys!

Thanks for visiting today.
Karen C.


Monday, August 29, 2016

Ian & Lea's Wedding

I'm finally posting some pictures from my 
son's wedding that took place in Vancouver on the 
Canadian Thanksgiving week-end (October 2015)

I made a variety of projects - 
both paper crafts and fabric crafts that 
I'll be sharing over the next few posts.

 Lea and Ian

The colour scheme was royal blue, with touches of fall colours.

Floral Arrangements
 I made a banner with white and blue card stock,
cutting letters and a heart using my Cricut machine.

The banner was positioned across the head table.

I made a wedding card that my other son and his girlfriend 
gave to the bride and groom.

 I used Papertrey Ink's Heart-2-Heart #9  
stamps and dies to make a clean and simple design.
I used Enchanted Evening ink and card stock 
along with Smokey Shadow ink for the sentiments.

It's hard to believe that they will be celebrating their 
first anniversary in just 6 weeks!!

Thanks for visiting today,
Karen C.

Sunday, August 26, 2012

Lovely Layers Wedding

When my son was visiting in July, he asked me to make a card for a friend's wedding. I showed him this card using Lovely Layers with Aqua Mist and Golden Harvest that I had made.  It really is a beautiful stamp and die set for weddings and anniversaries ... so elegant. I made a few changes in the overall design and changed the colour scheme for this card:


Details:
The front panel was impressed with the Vineyard Impression Plate and then the large leaf die from Lovely Layers was used to cut the shape from the center of this panel. I carefully stamped the leaf image onto the white card base, by positioning the front panel opening where I wanted it to be on the finished card. The die cut was also stamped with Spring Moss and Simply Chartreuse and then placed on top of the front panel. 3-D foam dots were used to create lots of dimension on the focal image.

The other layers were created with the dies using Winter Wisteria card stock, stamped with Royal Velvet ink; and Lavender Moon and Winter Wisteria flowers on Soft Stone card stock.
The center of the flower has 9 mini lavender pearls for an elegant finishing touch.


The sentiment (Fillable Frames #2) was stamped onto Stamper's Select White card stock with Royal Velvet ink and then cut with the Word Window punch from SU. This was mounted onto a Spring Moss Modern Label (SU).
Two pearls were added to the label.


Inside:
The main sentiment is from Quilter's Sampler and 
the small 'wedding day' sentiment is from Tag-Its #5.

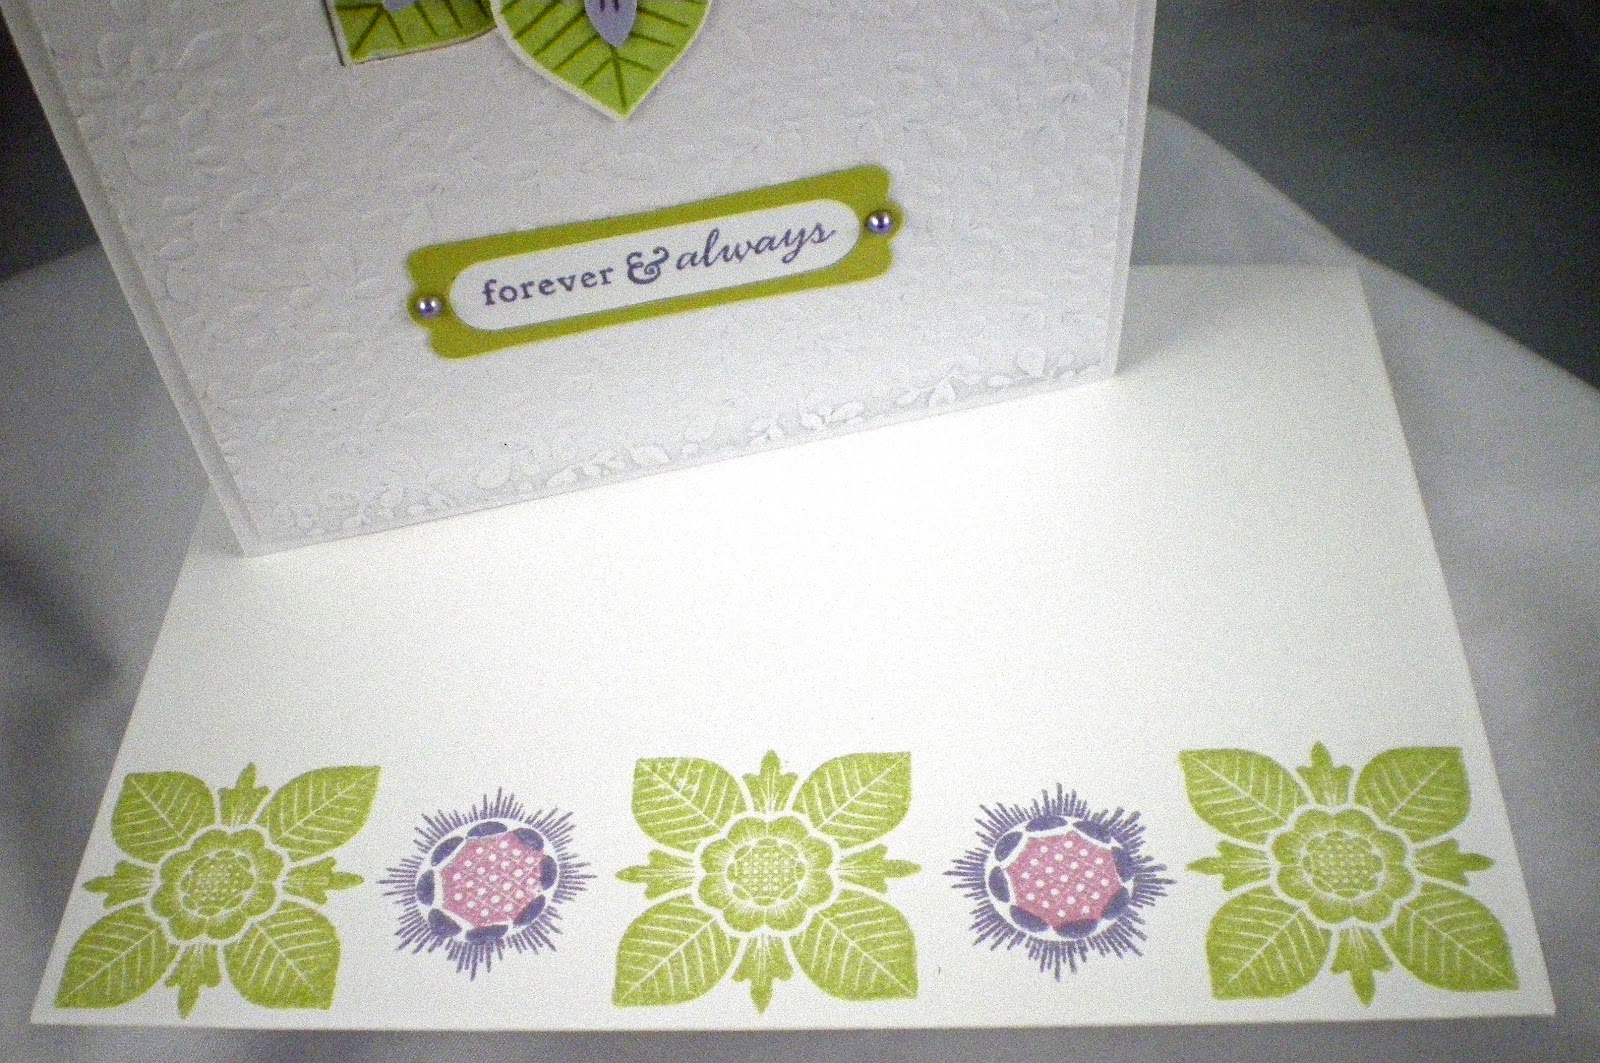
Envelope:
I also made a matching envelope, using the same colour 
scheme and stamps from Lovely Layers. I didn't know 
beforehand, but the wedding colours were lavender and 
green, so this wedding card was a perfect match for the event!!


Card Details: (PTI, unless noted)
Stamps - Lovely Layers; Fillable Frames Additions  #2, Quilter's Sampler, Tag-Its #5, 
Inks - Lavender Moon, Winter Wisteria, Royal Velvet, Spring Moss, Simply Chartreuse
Paper - Stamper's Select White, Winter Wisteria, Spring Moss, Soft Stone
Dies - Lovely Layers Die Collection
Other Supplies -  Vineyards Impression Plate; Stampin' Up Modern label & Word Window punches; 3-D Dots; pearl adhesives, Copic markers
Thanks for visiting today.
Karen C.

Wednesday, August 17, 2011

Wedding Day Wishes

My son asked me to make a card for a friend's wedding at the end of August. Several new items from Papertrey Ink were sitting on my desk so I decided to incorporate them into the design. The wedding invitations had a white and deep burgundy colour scheme, so that was the colour inspiration for this card:

I'm really loving the new Vineyard Impression Plate from PTI.
It's so detailed and adds a lot of dimension to a clean and simple card.

Front  Details:  (all PTI unless noted)
~Scarlet Jewel card base
~Vineyard Impression Plate on Stamper's Select White card stock
~Leafy Vine Border using Scarlet Jewel; edges of vine were sponged with Fresh Snow ink.
~DayDreamer images stamped with Close to My Heart Vineyard and Garden Green Inks
~The flowers were hand cut and added with foam dimensionals. 
~Mini white pearls  (Kaisercraft) were added to each flower image.
~Sentiment panel was made with the  Friendship Jar Label die and frame stamp.
~Sentiment from Delighful Dahlia.


Here's the inside of the card:


Inside Details:
I used a sentiment  from Day Dreamer and then repeated the 
floral images from the card front in Vineyard and Garden Green.

Thanks for visiting today. Have a great week.
Karen C.

Thursday, June 2, 2011

Happily Ever After

My son flew out early this morning to attend his friend's wedding in Regina, Saskatchewan.  He asked me to make a card for the occasion, so I pulled out my Papertrey Ink stamp book and showed him a few options. He didn't want birds, or hearts or anything too fussy, so here's what I finally designed after a bit of trial and error!!


I used the Take Three Die and  floral stamp images from Take Three: Summer, and chose a pink, white and black colour scheme. The 3 images were stamped on the die cut squares with SU's Pixie Pink and then the edges were sponged in black ink. A small black pearl was added to each of the images.

The 'top' layer started with Papertrey Ink's Stamper's Select White card stock. I die cut the three openings, impressed the upper portion with the Canvas Impression Plate and then added the sentiment (from Love Lives Here) using black embossing powder. It may be difficult to see, but I cut a second layer in black card stock, so that I could glue it to the back of the white layer. This creates a shadow effect around the three frames.   


Finally, the three stamped images were glued to the black mat and white card base; then the white top layer was added with foam dimensional strips. This really creates a shadow box effect for the focal images. The black gingham ribbon and bow adds a little detail without being too 'fussy'.

On the inside of the card, two sentiments from the Mat Stack #2 Collection were used, along with a flower image from Flower Fusion #3


Card Details:
Stamps:  PTI Take Three: Summer;  Love Lives Here;  Mat Stack #2 Collection; Flower Fusion #3
Inks:  SU Pixie Pink; VersaMark; Memento Tuxedo Black
Paper: PTI Stamper's Select White; black card stock from my stash
Other Supplies: PTI Canvas Impression Plate, Take Three Die; Black pearls, Black embossing powder; foam dimensional tape; Black gingham ribbon; corner rounder


Thanks for visiting.
Karen C.