Welcome to my crafty blog... a "garden" of colourful cards, quilting, sewing projects, knitting...and what ever else happens along the way!!


Showing posts with label Buttons. Show all posts

Thursday, April 30, 2015

Blue and Yellow Quilted:Spring

Wow!!  It's been a month since I've updated my blog!! 
I've found it very difficult to get back into a regular routine 
after our west coast vacation. 
I have been crafting, but not posting to my blog ... 
so I have lots to share!!

Quilted:Spring stamps and dies are my new favourites!! 
They've been on my desk for several weeks now and 
I keep reaching for them for a variety of occasions! 
I've always liked blue and yellow together 
and used this combination to make a birthday card, 
 a small note card and a sympathy card.

Birthday Card
This card has several layers:
Stamper's Select White Card base
Stamper's Select White Front panel:  
 - cut with the Stitched Rectangles die;
 - sentiment (Keep It Simple: Birthdays)
 - impressed with Aida Cloth Impression Plate; 
 - stitched with blue embroidery floss.

Quilt Block die 
The quilt was cut 3 times to create a multi-coloured look:
     1. White card stock was stamped with Blueberry Sky and Lemon Tart
     2. Blueberry Sky inserts - impressed with Aida Cloth Impression Plate 
     3. Lemon Tart Patterned Paper - frame was applied to the block.

 Flower Accent:
 Quick Stitch: Sewing Staples Kit dies 
- Harvest Gold felt stitched with blue embroidery floss
 Bitty Button Stacks 
 - coloured felt circle with a blue copic marker; 
stitched with yellow embroidery floss


Inside
The sentiments
(Movers & Shakers, and Purls of Wisdom) and a 
floral stamp (Sewing Staples) were added to the inside of the card. 

Quilt Block Note Card
The circle portion of the quilt block was leftover from the birthday card, 
so I used it to create a portion of the design for this card:
The circle was stamped (Polka Dot Basics & Blueberry Sky ink), then 
glued to a 3" square Blueberry Sky panel. This was then impressed 
with the Linen Impression Plate before adding the patterned paper inserts.

 Flower Accent
Bitty Button Stacks die cuts - card stock & patterned paper
Sewing Staples die - Six leaves die cut from green card stock
.


A 3 1/2" square card base was stamped with Autumn Pattern Pieces and Blueberry Sky ink. I thought that the pattern was too strong and competed with the quilt block, so I cut a vellum square and attached it to the card front.
You can see the original stamped background on the strip to the right of the card and how it is softened by adding the vellum.
This technique was highlighted in Papertrey Ink's 
Make It Monday #210 by Lizzie Jones.


Sympathy Card

Unfortunately a friend recently lost her husband.  
She lives in Alberta, so I wanted to send her a card and 
note to let her know that I'm thinking of her family. 
 I had been making several of the quilt blocks for cards 
and thought this would work for a sympathy card.
I kept this fairly simple.
All of the quilt block images were stamped directly onto a 
white card base with Blueberry Sky and Harvest Gold inks. 
The sentiment (Botanical Silhouettes) was stamped with 
Blueberry Sky ink, then card front was impressed 
with the Canvas Impression Plate. The frame 
(Bo Bunny Double Dot)  was attached to the front.
The flower was created by cutting several Bitty Button Stacks  
from blue and yellow papers, layering and stitching them 
together before adding them to the center of the quilt block.
Inside
The sentiment and small quilt block image  
(Quilter`s Sampler) were added to the inside of the card.


Card Supplies (PTI unless noted) 
 Birthday Card
Stamps - Quilted: Spring, Keep It Simple: Birthday, Movers & Shakers, 
                Purls of Wisdom, Quick Stitch: Sewing Staples
Inks - Lemon Tart, Blueberry Sky, Harvest Gold
Paper - Stamper's Select White, Blueberry Sky, Lemon Tart Patterned Paper
Dies - Quilted: Spring, Quick Stitch: Sewing Staples die collection, Stitched Rectangles.
          Aida Cloth Impression Plate, Bitty Button Stacks
Other - Harvest Gold felt, blue and gold embroidery floss; blue and yellow copic markers

Quilt Block Note Card
Stamps - Polka Dot Basics, Autumn Pattern Pieces
Inks -  Blueberry Sky
Paper - Stamper's Select White, Blueberry Sky, Vellum; Bo Bunny:Soft Shades Double Dots.
Teresa Collins: everyday moments 6 x 6 designer card stock; green card stock
Dies - Linen Impression Plate, Quilted: Spring, Bitty Button Stacks 2,   
          Quick Stitch: Sewing Staples die (leaves); Nestabilities: Large Classic Squares; 

Sympathy Card

Stamps - Quilted: Spring, Botanical Silhouettes, Quilter`s Sampler
Inks - Harvest Gold, Blueberry Sky, Memento Tuxedo Black
Paper - Stamper's Select White, Blueberry Sky, Bo Bunny:Soft Shades Double Dots.
Dies - Quilted: Spring, Bitty Button Stacks; Canvas Impression Plate
Other - Harvest Gold, yellow embroidery floss; copic markers


Thanks for visiting today.
Karen C.

Wednesday, March 25, 2015

Papertrey Ink March 2015 Blop Hop & MIM #206

I'm slowly getting back into my craft room after a fun vacation.
I'm looking forward to playing with my paper and ink!!

I loved this month's inspiration photo for 
Papertrey Ink's Blog Hop: Aqua and Yellow ... 
Blog inspiration
... but I was also intrigued  by Danielle Flander's  
Make It Monday video: Stamping  and Mixing Patterns ....
so I combined the two challenges to make a baby card!!

I started by cutting the Cover Plate: Comic Strip die 
from Aqua Mist and Stamper's Select White card stock.
The aqua frame was glued to a white card base.
Using the tips and techniques from this week's MIM, 
several stamp sets and ink colours were chosen to 
stamp patterns onto the 5 white card stock pieces.
I used Aqua Mist and Lemon Tart inks, with an accent 
of Spring Moss on the Polka Dot panel.

Top Left Panel - Birthday Style, Polka Dot Basics
Top Right Panel  - SAF 2014: 1940's; Bitty Background Blocks;
Buttoned-Up  #2 die;  Coaster Board; aqua embroidery floss


Center Panel  - Background Basics: Gingham 
Wreath for All Season's (sentiment) - Versafine Onyx Black ink
Block Alphabet Dies - Aqua Mist card stock


Bottom Left Panel  -  Autumn Pattern Pieces
Bottom Right Panel   - Crackled; Friendship Jar Spring Fillers; copic markers
Memento Tuxedo Black ink; Versafine Onyx Black ink; Tropical Teal ink


Thanks for visiting today. Enjoy the Blog Hop.
Karen C.

Wednesday, February 12, 2014

Papertrey Ink: Stripe Challenge

Wow, this has been a busy time at Papertrey Ink
Each day of the Anniversary Celebrations has seen a card 
challenge issued and I've tried to play along with a few. 


Stripes were on the menu today and I cased  Nichole Heady's card (here) 
to create a gingham effect. She used two new cover plates to make masks 
and then sprayed a colour mist over the vertical and horizontal stripes.
 
I used a different method to create my stripes, and even though it took 
some time, I really like the effect. Each of my "stripes" are 3/8" wide. I placed 
washi tape on either side of the area that I wanted to colour and then used 
an ink blending tool with Aqua Mist ink.  After completing the vertical stripes, 
I used the same process to make the horizontal stripes.

Card Front and Card Base 
Stamper's Select White card stock;
Sewing Machine Stitching


Sentiment Panel
Limitless Layers: 2 1/4" Ovals; Stampers Select White Card stock;
The sentiment (Framed Out #1) was stamped with VersaMark ink and then 
Clear Embossing Powder was applied. The blending tool was used to add 
Berry Sorbet Ink. The sentiment really stands out against the coloured background.
Leaves
 Simply Chartreuse Felt; Heart-2-Heart Die
Button Flowers
 Coaster Board; Button-Up #2 Die Collection; Button Boutique;
Summer Sunrise, Berry Sorbet & Aqua Mist inks; foam tape; white embroidery floss

Other Details
Berry Sorbet Twill Tape Ribbon; Crochet Cotton

Thanks for visiting today.
Karen C.


Sunday, February 9, 2014

Papertrey Ink: Celebrating Birthdays

It's Day 5 of Papertrey Ink's Anniversary Celebrations 
(details here) and today we were challenged to make a 
"birthday card" to celebrate their 7th year of stamping fun!!

I've been working on various challenges and 
papers and inks were scattered on my desk, so I took 
my inspiration from some of my favourite PTI products. 

Stamper's Select White card stock was stamped with
Movers and Shakers Sentiments in True Black ink. 

Stitching Impression Plate  was a great choice to create a 
'fabric background' - I love adding texture to my cards

I then cut seven"buttons" from coaster board 
using the  Button Up #2 die collection.
The 'buttons' were stamped with Papertrey Ink colours:
Berry Sorbet, Hibiscus Burst, Summer Sunrise, Harvest Gold, 
Simply Chartreuse, Aqua Mist and Hawaiian Shores using  
a polka dot button stamp. (Button Boutique) The buttons 
were tied with white embroidery floss, then glued onto 
the card under the sentiment.

The stamp showing the # of years (7) is visible in the 
top corner. It was stamped with Hibiscus Burst Ink and 
the card was mounted onto a Hibiscus Burst card base.
 
This could be classified as 'clean and simple' - not usually my 
style, so I keep debating if it needs something else added. But I 
will have to leave it for now - time to get it posted for the challenge!!

Thanks for looking today.
Karen C.

Tuesday, November 26, 2013

Button Bits Santa


I'm back today with another card I made for the 
Festive Friday Blog: Final Challenge, using 
my favourite colour scheme of red, green and 
gold and the sweet Santa from Holiday Button Bits. 


Pure Poppy card base (4 1/4" square) was used to make this 
fun Christmas card - perfect for one of my little grand nieces.
* Three papers (Bo Bunny Mistletoe Collection) were used on the card front. 
* Santa - coloured with copic markers; Pure Poppy felt button was added.  Black embroidery floss accents the "tummy".
* Frame - made by cutting several layers of chipboard into a rectangular shape and covering it with one of the patterned papers.  Label Basics Angled Die was used to cut the opening. 
* Sentiment (AmyR Stamps) was stamped with New Leaf and Pure Poppy inks, onto a hand cut notched banner. A white bow and a tiny gold 'jingle' bell accents the sentiment panel.
Santa's head and beard were stamped, fussy cut, then 
added to the original image with a dimensional foam dot. 


A sentiment (Winter Sentiments - AmyR Stamps) was stamped with 
Pure Poppy ink on the inside of the card. The "North Pole" seal 
(Neat & Tangled) was embossed with gold embossing powder.

Card Details (PTI, unless noted)
Stamps - Holiday Button Bits; AmyR Stamps: Winter Sentiments; Neat & Tangled: Santa's Notes
Inks - New Leaf, Pure Poppy, Memento Tuxedo Black; Versamark
Paper - Pure Poppy, Stamper's Select White; Bo Bunny Mistletoe Collection
Dies - Button-Up #2 Die, Label Basics Angled Rectangle Die
Other - Pure Poppy felt; SU: Gold Embossing Powder; copic markers; 
black embroidery floss; white ribbon; gold mini bell; sewing machine; chipboard

Thanks for visiting today.
Karen C.

Saturday, November 23, 2013

Holly Leaves & Button Berries


We're heading into the last month before the holiday season and I'm still making cards for my Christmas mailing list. The Festive Friday Blog has been a great inspiration for colour schemes and themes and this week the challenge was to choose one of the 22 previously described challenges. I love the traditional colours of the holidays, so I chose the colour challenge using red, green and gold.

When Papertrey Ink came out with the die collection for Holiday Button Bits, I was excited to add this stamp set and dies to my 'collection' last year. 


* The large holly image was stamped with Memento: Cottage Ivy ink onto Rustic White card stock.
* The sentiment (Holiday Wishes) was stamped with Versamark and heat embossed with red EP.  
* The postmark stamp (2010 Holiday Tags) was stamped with black ink.

* A border stamp (Postmarks) was added to the bottom with Cottage Ivy and Pure Poppy inks. When I was stamping, an extra ink spoltch appeared on the edge of my card front. My solution? I took the small stamps included in Watercolour Wonder and stamped them around three edges of the card. 
* This panel was attached to a green mat and then a Rustic White card base.

* I stamped the leaves directly onto the card front, die cut three leaves and stamped them on the front and back with the matching stamp. I stitched them to the card front along the center and then curled up the edges to give them lots of dimension. 
* Three red buttons, accented with red embroidery floss, were positioned at the base of the leaf trio. Gold adhesive pearls were also added around the focal image.

* The holly border (CTMH: December Word Puzzle) was stamped with Cottage Ivy;  red 'berries' were added with a red metallic pen.
* The sentiment (Holiday Wishes) was stamped with Pure Poppy ink.

Card Details  (PTI, unless noted)
Stamps - Holiday Button Bits, 2010 Holiday Tags, Postmarks, Holiday Wishes, Watercolor Wonder;  December Word Puzzle (Close To My Heart)
Inks - Smokey Shadow, Pure Poppy;  Memento Cottage Ivy; Versamark
Paper - Rustic White,  Stamper's Select White; Recolllections: Green,
Other Supplies -  Martha Stewart: Ladybug Embossing Powder; red buttons, embroidery floss, red metallic pen, brass adhesive dots, sewing machine

Thanks for visiting today. 
Karen C.

Friday, March 25, 2011

Papertrey Ink March 2011 Blog Hop Challenge

  
Welcome to the March Papertrey Ink Blog Hop. 
This month Nichole challenged us to use embroidery floss in a fun and inventive 
way on a project. This could include stitching, wrapping it around and tying it like 
ribbon, braiding,accenting tags, embroidered patterns or anything else you can dream up! 
 
     My first love is sewing and quilting, so I have a great stash of fabrics, threads and embroidery floss, but I do find it difficult to incorporate these things into paper crafting. I must have a block against mixing paper and sewing/fabrics. This blog hop challenged me to take the plunge!!

      I don't have my PTI Button Boutique stamp set and dies yet, but I wanted use the 'button' concept for this challenge. Most of the supplies for this card are from Papertrey Ink, so I used a button card from  Stampin'Up  for this card.   I made a Baby card for my niece who is expecting her 2nd daughter in April. 


     I started by stamping the lower portion of the white card stock with Polka Dot Basics using Close to My Heart 'Blush' ink. The top portion was created by stamping one of the stripes from Distressed Stripes vertically and horizontally to make a checkered effect.  I then used the Linen Impression plate to create some texture on the stamped card stock.


     The button card (stamped in Chocolate) was layered on yellow and pink card stock and a doily. Yellow ribbon and a bow adds a little colour to the focal point. The 4 little pink buttons are from PTI's Vintage Spring Mix.  I sewed them into the card with white embroidery floss. 

     I added the sentiment  'cute as a button'  (Stamping Bella) to the lower portion of the card and finished with 3 little cross stitches in yellow embroidery floss.  The finished front panel was mounted on to a yellow card stock base.


Two sentiments from Mega Mixed Messages: 'hello' and 'little one' were lined up to create one phrase on the inside of the card.  


Edited: I finally received my new Button Boutique Stamp and Die sets from Papertrey Ink, so I added these cute little buttons. I die cut , stamped and layered two of the buttons and then sewed them together with some yellow embroidery floss. It gives a perfect finish for a 'cute as a button' card for a new baby girl!!


 Card Details
Stamps: PTI Polka Dot Basics, Distressed Stripes, Mega Mixed Messages; Stamping Bella; Stampin'Up Sew Suite
Inks: PTI Vintage Tea Dye Duo; CTMH Blush, Chocolate
Papers: PTI Stamper's Select White; yellow, pink scrap card stock
Other Supplies: PTI Linen Impression plate, Spring Mix Buttons;  white & yellow embroidery floss; doily;  yellow ribbon;  


Thanks for hopping today!! Have a great week-end. 

Thursday, August 19, 2010

Hot Air Balloons x 2

Everyday Button Bits

     One of the first sets that I got from Papertrey Ink was  Everyday Button Bits, because I liked the hot air balloons and the option of adding colourful buttons to all the images. Shortly after I received my order, the  Up, Up and Away set was introduced, and I knew I had to get that one as well - clouds, sunshine, balloons, dies  and lots of sayings - what's not to love!!  Here's my 'take' on these two sets!!

I sponged the background of the main image to create clouds in the sky and then used the Papertrey Ink rick rack die  to cut the "grass for the outside and the inside of the card


and then added more patterned paper and coloured circles on the inside for a bright and cheery look.

Stamps: PTI Everyday Button Bits
Paper: Recollections card stock & patterned paper
Other Supplies: circle punches; ticket corner punch; rick rack die; corner rounder; markers; buttons
Inks- CTMH


   This card uses all the elements from Up, Up and Away -  I  made it for a friend who retired from teaching in June. I used the Tin Types Impression Plate on the blue sky background and then added some glitter with a gel pen to each of the indented circles. It really adds a nice touch IRL. The background paper has a pastel plaid colour scheme, so I stamped the balloons in Garden Green and Crystal Blue inks from CTMH and Pixie Pink from Stampin'Up. I used my new dies to cut out the balloons and clouds. A glitter gel pen outlines the clouds with faux stitching. One of the clouds is popped up with dimensionals. The ribbon is from my stash, but the button is from PTI.


Matching Envelope


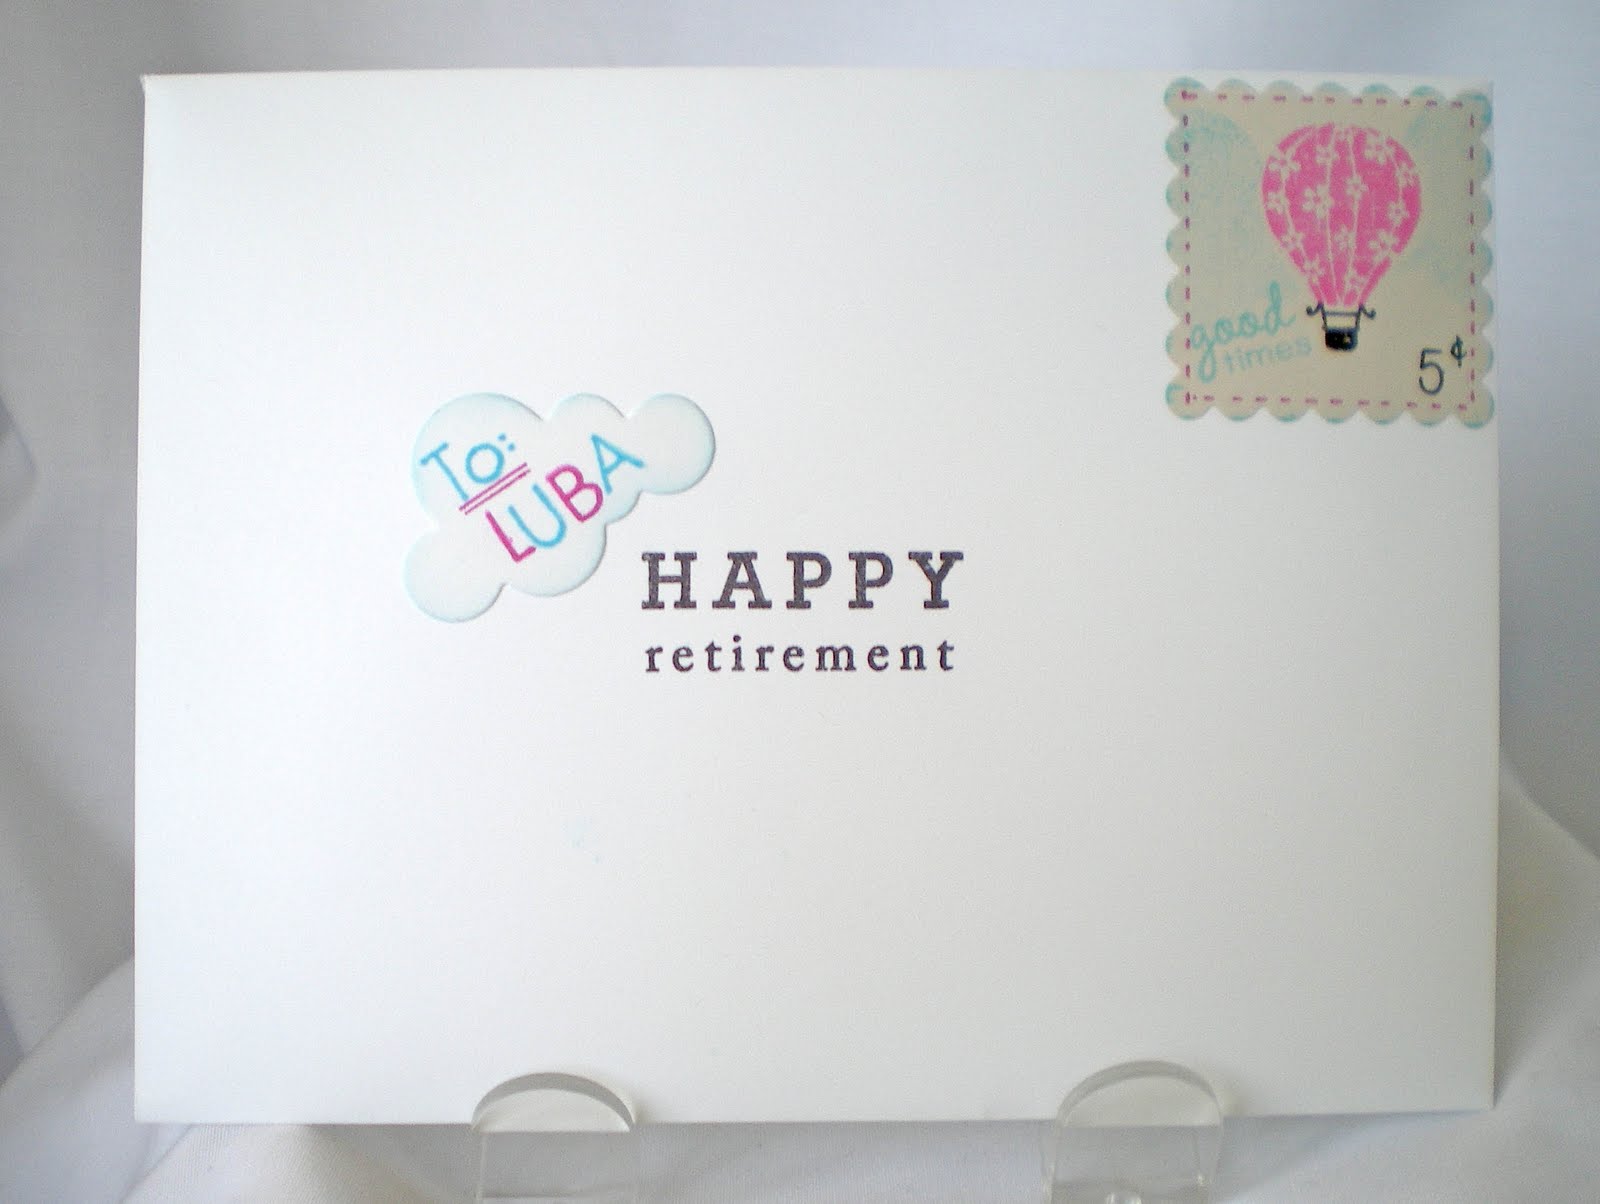
A small stamp was cut from a Sizzix  die- I added another balloon image and the "good times" sentiment from Mini Scrapbook Series:Tabs. The 5c and name are stamped from a CTMH set. Happy Retirement is from PTI Mega Mixed Messages.


 Stamps: PTI Up, Up & Away; Mini Scrapbook Tabs; Mega Mixed Messages
Paper: Recollections paper
Other Supplies: Tin Types Impression plate; PTI balloon &clouds dies; Sizzix stamp die; ribbon, PTI button;  glitter gel pen.
Inks- CTMH; Stampin'Up