Welcome to my crafty blog... a "garden" of colourful cards, quilting, sewing projects, knitting...and what ever else happens along the way!!


Showing posts with label Clear Dollar Stamps. Show all posts

Monday, August 18, 2014

Something Old, Something New

Today's post is a little different, incorporating some "old" cards that I found in my stash and some "newly" decorated envelopes to go with them!!

Like many stampers, I have a collection of cards tucked away and somewhat forgotten. This summer I spent time cleaning and organizing in my craft room. My space was in so much chaos, I just didn't feel like creating. I knew that I had to get a handle on all of the new and old products and projects that were piling up. At the same time, I needed a variety of birthday and anniversary cards for family members. As I was going through the saved cards, I picked out a few that I thought would work and then set about making a "new" envelope to give the card a fresh look.


Something Old #1: 
I made several of these cards and kept one in my stash. (details here) 
It was a perfect time to use it for my grand niece's first birthday in August.
Gigi Giraffe: Clear Dollar Stamps
Card Interior

Something New: Envelope #1
PTI:
Circle Scribbles and Polka Dot Alphabet
 Hibiscus Burst. Limeade Ice, Harvest Gold, Winter Wisteria


Something Old #2:
I had made a slider card using the 3 image panels below. 
I didn't like the way it looked, so I re-worked the pieces to create 
a card with extra sentiment pages for my 4 year old grand nephew. 
He's into pirates so this was a real hit with the birthday boy!

Card Front
PTI:
Card Base: Kraft Card stock
Stamping Up
Card Front: Ahoy, Matey; Matey Wheel  
Chocolate Chip & Pacific Point Card Stock
Watercolour pencils

Center Pages
Close To My Heart
Friendship Word Puzzle; Friendship Alphabet
Moonstruck, Cranberry inks
PTI
Rustic Cream Card Stock,
Sew Simple Borders, Dark Chocolate


Interior Page & Back
Close To My Heart
Birthdays, Good Times
PTI
Canyon Clay, Dark Chocolate inks

Something New: Envelope #2
PTI:
Up, Up & Away
Tiny Treats: Valentine; Fresh Snow Ink;
Close To My Heart
Charm Alphabet; Outdoor Denim ink;  
Memento Tuxedo Black;
Copic Markers


Something Old #3: 
 This was a card from my stash -  I used it for my niece's anniversary.
 Stamps
High Hopes Stamps: Hopeful Ant  
  TPC Studios: Playful Expressions

 Close To My Heart
Black & Cranberry Inks; Cranberry Card Stock

My Mind's Eye Patterned Paper
Scalloped Border Punch 
  Watercolour Pencils; Cranberry Ribbon

Something New: Envelope #3
PTI:
No Strings Attached, Tag It's #5
Background Basics: Medallions 
Close To My Heart
Cranberry, Olive inks

Envelope Flap: Medallions  

Thanks for visiting today.
Karen C.

Monday, August 13, 2012

Golf Spinner Birthday

My oldest son celebrated his birthday in July. This is the card I made for his younger brother to give to him. DS1 loves to golf and I thought Papertrey Ink's Movers and Shakers Spinner die would make a great card for him.


I created a background scene for the golfing images, by cutting green patterned paper with the snow hills die from PTI. It was mounted onto a piece of Spring Rain card stock that had been impressed with the Sunshine Impression Plate. Two clouds were die cut and one was embossed with a Swiss Dots embossing folder before adding to the scene.


The slot was cut in the lower portion of the card front so that the golf ball (Clear Dollar Stamps) could 'spin' across the card front. A large circle stamp was used to stamp a black image on the card front and the corresponding position on the card base, to create the 'cup' at the 16th hole!!

The flag at the 16th hole was made by cutting a thin strip of Dark Chocolate cardstock to create the pole and then adding the stamping banner. (Waltzingmouse Stamps and Nestabilities: Nested Pennants)

The background trees (Close to My Heart) were stamped with Simply Chartreuse ink. The sentiment is a combination of two stamp sets: Movers and Shakers Sentiments and Golf Set (Clear Dollar Stamps). The arrows were stamped with Pure Poppy ink using the image from Movers and Shakers Sentiments.

Card Details: (PTI, unless noted)
Stamps - Movers & Shakers Sentiments, Postmarks;  Clear Dollar Stamps: Golf Set; Close to My Heart: A Journey; Waltzingmouse Stamps: Bitty Banners
Inks - Pure Poppy, Simply Chartreuse, Fresh Snow;  SU: Bashful Blue; Memento: Tuxedo Black; CTMH: Chocolate
Papers - Stamper's Select White, Dark Chocolate, Spring Rain; SU: Certainly Celery - Designer Series Patterns
Dies - Movers & Shakers: Spinners, Snow Hills, Clouds; Nestabilities: Nested Pennants
Other Supplies - 1" circle punch; Cuttlebug Swiss Dots Embossing folder; EK Success: 3D-Dots

Thanks for visiting today.
 Karen C.

Tuesday, July 5, 2011

Candles and Fireworks

 I make cards for all the fellas in my family -  husband, sons, 
brothers, nephews and grand nephews.  So . . . I thought I 
would dedicate a few more blog posts to all the boys and 
men in my life. Hope you find something that inspires you!!
  
Blues and yellow or orange always seem to be a good colour combination for male cards and I've used some patterned papers for interest as well.

28 CANDLES
Do you remember the movie "16 Candles"?   
I used that title to inspire this card for a 28 year old!!  The multi-coloured plaid paper acts as a matting for all three panels on the card front. 
The candles, the number and the wording have also been matted onto green and a yellow/orange card stock for lots of layering.  The word 'candles' was made with a set of letter punches that I purchased many years ago (from Michaels)
On the inside of the card, I made sure to stamp and colour 28 candles - they certainly filled up the interior of the card.   LOL!!


Card Details:
Stamps:  Studio g: Candles;  Close to My Heart: Charm Alphabet/Numbers
Inks: CTMH Black, Goldrush
Paper: SU Certainly Celery; yellow/orange, white, blue card stock; plaid patterned paper.
Other Supplies: markers;  glitter pen;  circle punches; letter punches


 WAGON WISHES
This Clear Dollar Stamp has lots of options to fill the little wagon. 
I love stamps that give this kind of  versatility. For this young fella's birthday card, I used the fireworks image to create a card that celebrates a special day. 


The main image was stamped on white card stock and then coloured with water colouring pencils and markers. It was fussy cut and then added to the focal panel with foam dimensionals. Stickles add sparkle to the fireworks and the centers of the wagon wheels.  
A  two sided patterned paper was used -  the striped side has the various colours that were used to pick the accents of Goldenrod and Cranberry. The navy and white polka dot side was used to mat  the focal image.


Card Details:
Stamps:  Clear Dollar Stamps: Wagon Wishes, Tag Its (sentiment)
Inks: CTMH black, Outdoor Denim
Paper:  Three Bugs in a Rug: Rescue Stripe; Goldenrod, Cranberry card stock
Other Supplies:  water coloured pencils; markers; Stickles; navy saddle stitch ribbon; corner rounder punch;  foam dimensionals

Thanks for visiting today. I always appreciate your comments.
Karen C.
Wednesday, June 29, 2011

Birthday Toys for the Big Boys

I make cards for all the fellas in my family -  husand, sons, 
brothers, nephews and grand nephews.  So . . . I thought I 
would dedicate the next 2 weeks to all the boys and men in 
my life.   Hope you find something that inspires you!!

MOTORCYCLE RIDER:
My older brother has always been a real adventurer. Right now he and my sister-in-law are on a motorcycle trip through the eastern part of the U.S. 

He's been riding motorcycles for many years, so I thought it was about time I made him a motorcycle birthday card. I started by printing this digital image and then colouring it with my copic markers, using the patterned paper as my colour inspiration.  I cut the paper into three strips and then mounted each of them onto blue card stock;  the panels were added to the yellow card base. 
 The coloured image was cut into an oval shape and then mounted on an oval blue mat.  A light blue ribbon was added to the left side, along with a yellow star button, and two sentiment panels. Follow Your Dreams  (from PTI's Fillable Frames #3) was stamped in a light blue ink and matted with more blue card stock. The oval panel was stamped with a sentiment from Close to My Heart's Today's Date, but this time it was cut with an oval punch.  Three brass brads were added to the lower right corner.

Card Details
Stamps:  CTMH: Today's Date;  PTI: Fillable Frames #3
Inks: CTMH Crystal Blue
Papers: Bella white card stock; yellow and light blue card stock; patterned paper from my scrap bin
Other Supplies:  digital image; copic markers; blue ribbon; yellow star button; blue embroidery floss; brass brads;


MR. FIXABELLA   
My husband has a workshop  behind our home that stores all of his 'equipment'. (like my craft room, only bigger with scary power tools and wood instead of paper, stamps and a Cuttlebug!!)  He can disappear for hours, working on various projects.
I do appreciate all of his hard work though, as he is always ready to listen when I say " I've been thinking...."  He knows that usually means I have a 'project' for him to tackle!!

This is the card I made him for his last birthday - I never got around to posting it!!   Stamping Bella's Mr. Fixabella seemed like just the right image for this job!!

The edges of the colourful plaid card stock were sponged with blue ink and then mounted onto the blue card base.
The main image was stamped onto white card stock and then coloured with water colour pencils. A blue mat was cut for the focal image using Nestabilities Deckled Rectangle. Two blue Stamping Bella dots were added to the top left corner.  The sentiment, from CDS's Tool Time was stamped onto the orange panel with dark blue ink.


I finished the inside of the card with some orange card stock and the plaid paper. The sentiment and measuring tape (CDS's  Tool Time) were stamped onto white card stock that had been cut with the Deckled Rectangle. Stickles were used to highlight the tape measure. Faux stitching was created around the orange panel with a white gel pen. Little blue circles were punched and added to the corners of each panel.


Card Details
Stamps: Clear Dollar Stamps: Tool Time;   Stamping Bella: Mr. Fixabella;
Inks:  CTMH: Black, Moonstruck
Papers:  Bazzill: blue, orange, white card stock; plaid patterned paper from my scrap bin
Other Supplies: Nestabilities Deckled Rectangles; Stamping Bella Dots; white gel pen; water colour pencils; Stickles; circle punches


Monday, June 20, 2011

Birthday Golf

I make cards for all the fellas in my family -  husand, sons, brothers, 
nephews and grand nephews.  So . . . I thought I would dedicate the 
next two weeks of blog posts to all the boys and men in my life. 
Hope you find something that inspires you!!


My oldest son is a basketball player during the winter and a golfer in the summer. Since I used so many golfing images for Father's Day this year, I thought I would show the card, gift certificate holder and gift tag that I made for my son that also included lots of golfing treats!!

THE CARD
The bright colourful argyle paper was my starting point and I used it for all of the projects. My husband gave me the score card from the golf course and I decided to use it on the card. I think it really adds a bit of authenticity to the card and certainly isn't something that you'd find on a store bought card. The golf clubs and the sentiment are both from Clear Dollar Stamps Golf Set. The felt star and the yellow star button are from my stash.
On the inside, a piece of yellow card stock was mounted onto the green card base. Four of the coloured diamond shapes were cut out and then adhered to a piece of white card stock. Beside that I stamped the sentiment from PTI's Fillable Frames #1.  Some more of the patterned paper was mounted onto a turquoise strip of card stock and then a red marker was used to create faux stitching around the edges.

Here are a few details and supplies for the card front and interior:
Stamps:  Clear Dollar Stamps: Golf Set, PTI Fillable Frames #1
Inks: CTMH Black, Ocean
Papers: SU Certainly Celery Card Base; Argyle Patterned Paper, Turquoise, Yellow  & White card stock
Other Supplies:  Felt Star, Yellow Star Button (tied with red floss) are from my stash.
Turquoise, Red & Yellow markers;  SU Ticket corner punch; Stamping Bella red Dots

THE GIFT TAG:  
This cute C.C. Design Balloon Trevor was added to the tag on one of the gifts for the birthday fella. He was stamped on Bella paper with Memento Tuxedo Black ink and then coloured with copics. The little T-shirt was paper pieced with the argyle paper, making sure to have one of the diamonds centered on the front. I mounted "Trevor" onto a piece of yellow card stock that had been run through the Cuttlebug with the Argyle Embossing folder and then cut with one of the Nestabilities Deckled Rectangle die. The edges were sponged with red ink.  


The balloon was stamped onto a piece of scrap red distressed paper, fussy cut and then added to the image with a dimensional foam dot.


The circle was stamped with a sentiment from PTI's Just for You and then punched out with a 1 3/4" punch. Another piece of patterned paper was punched out into a circle and then stamped with "treats" and added to the center of the circle.


THE GIFT CERTIFICATE
I purchased a gift certificate from one of our local golf courses and created this little pouch to hold it: The Mat Stack #2 die was used to cut a piece of turquoise card stock.   A 1 3/4" circle of patterned paper was added to the mat stack and then the golf ball image from CDS Golf Set was stamped and mounted onto the center.  I stamped it with the "30th" to represent his age!!  The leaf image from CDS Tags  was stamped on the Mat Stack sides  for added interest.

Two holes were punched in the Mat Stack so that a green ribbon could be threaded through the ends. the sentiment from Tag-its #1 was stamped with CTMH Ocean ink on the bottom corner. The gift card holder was made  usingPTI's Seed Packet die, cut from white card stock, embossed with the Sunshine Impression Plate and then sponged with yellow ink. It's the perfect size for a gift card and I know I'm going to be using it a lot.


Thanks for visiting.    
Hope you enjoyed this little group of stamping treats!! 
Karen C.

Tuesday, June 14, 2011

Father's Day - Golfing the Day Away!!

My husband is a golfer . . . . so a Father's Day card with a golf theme is always appreciated!!  This first card is one I made for him last year and the second one is the 2011 version of Golf/Father's Day card.

Father's Day 2010 
I think I'm addicted to green paper, especially this Stampin'Up Certainly Celery. I combined it with navy blue and a small panel of striped paper that I had in my stash.
The golf shoes and words are from Golf Set  (Clear Dollar Stamps). 
I stamped them onto white card stock with green and blue inks and then coloured the shoes with SU's Certainly Celery marker. The edges of the card were sponged and distressed with a blue ink. I added some of the golfing terms around the shoes using some blue and green inks. 

The main image was mounted on blue and green card stock and then added to more white card stock that was embossed with a Swiss Dot folder. Several rows of dots near the edge have been coloured using the green marker. 
The sentiment in the oval panel is from a Close to My Heart Stamp set called Today's Date.  It was stamped onto white card stock and mounted onto a blue oval. Faux stitching with a white gel pen, a navy eyelet and green ribbon finish the tag.  Although this was made for Father's Day, it could easily be adapted for a birthday card.

Father's Day 2011
I bought this Kraftin' Kimmie stamp at my LSS earlier in the year with the plan for a Father's Day card this year. Raymond: the golfer was stamped onto white Bella paper with Memento Tuxedo Black ink and then coloured with my copic markers. I fussy cut Raymond so I could attach him to a prepared background that I created on a PTI Library Card Tag cut from white card stock.

SU's  Bashful Blue ink and the Weathered Background stamp was used on the upper portion of the white tag to create a 'sky'. The grass stamp from PTI's Garden Variety was stamped multiple times to create the grassy golf course.    
I stamped the strip  from Postmarks in Bashful Blue and Goldrush along the left side of the tag.  The little golf ball was created by punching out a small circle and then adding black markings and edges.


The little bird from Grunge Me was then added with Outdoor Denim ink - to create longer legs, I used a matching marker and extended them to the bottom of the tag. CTMH Goldrush ink was used to stamp "birdie" (from Clear Dollar Stamp's Golf Set)  onto a little strip of white card stock and then the edges of the tag and the word strip were sponged with the denim ink.


In order to create a card, I scored the Library Card Tag along the top and then used Scor-tape to adhere it to a second tag. A dark blue marker creates faux stitching along the score line. A blue ribbon was added to the top.
 

Three little blue dots from Staming Bella were added to the top left corner. A 'stamp' using the Postage Stamp die from PTI and the outline edge stamp  from Postmarks was created for the top right hand corner. The sentiment from Tag-Its #2 was added with more Goldrush ink. Some little splotches from Grunge Me were stamped in the light blue ink on top of the sentiment to add an aged look. Before I adhered the stamp, I used the circles from Grunge Me and stamped them in the top right hand corner. This image "peeks" out from under the stamp.
Blue argyle patterned paper was used to add some interest and colour to the inside of the card. A piece of Certainly Celery card stock was cut with PTI's Rick Rack die in order to create a "grass' effect. The sentiment, from Fillable Frames #6 and the golf club from CDS Golf Set finishes the interior of the card. I used a total of 8 stamp sets (5 from Papertrey Ink) to create this card.  My desk (and room) was a complete disaster after I finished this!! :) 

Thanks for visiting!!
Karen C.

Golf Shoes Card Details:
Stamps: Clear Dollar Stamps:Golf Set;  CTMH:Today's Date
Inks: CTMH Garden Green, Moonstruck
Paper: SU Certainly Celery, White, Navy; patterned paper from my stash.
Other Supplies: Cuttlebug Swiss Dot Embossing folder; SU Certainly Celery marker; White Gel pen; navy eyelet; green ribbon; oval punches;


Golfing Raymond Card Details:
Stamps: Kraftin' Kimmie: Golfing Raymond;  SU Weathered Background Stamp;
PTI: Postmarks, Grunge Me, Garden Variety, Tag Its #2, Fillable Frames #6 ;   
Clear Dollar Stamps: Golf Set.
Inks:  Memento 'Tuxedo Black; SU Bashful Blue; CTMH Sweet Leaf, Goldrush, Outdoor Denim
Paper: Bella white cardstock; PTI Stamper's Select White card stock; Provocraft: Blue Diamonds
Other Supplies: PTI Library Card Tag die, Postage Stamp die, Rick Rack die; blue ribbon; small circle punch; CTMH Outdoor Denim marker, Black marker; Stamping Bella Dots (blue).


Saturday, June 4, 2011

New Car Congrats


This is a card I made for my son when he got his first 'brand new car'. 
It was such a thrill for him. 

Even though he didn't get a VW 'bug', I used this image from Clear Dollar Stamps.  Two co-ordinating papers create a background and a thin strip of Gingersnap card stock was added at the seam. The same card stock, along with a dark blue were used behind the sentiment panel.

The car keys and the car image were stamped, coloured, fussy cut and then added to the card with dimensionals. I used water colouring pencils to colour the image.  Hopefully, my copic collection will expand to include some additional blues, but I still like using my pencils sometimes too!!

Card Details:
Stamps: Clear Dollar Stamps Sometimes You're the Bug
Inks: Close to My Heart Black, Moonstruck
Papers: Blue and gingersnap card stock; patterned papers (from my stash)
Other Supplies: water colouring pencils, blue marker, SU ticket corner punch

Thanks for visiting!!
Karen C.

Monday, November 1, 2010

Baby Boy Gift Tag - Gigi the Giraffe


BethieJ's Challenge Week #4:
Papertrey Ink - Just the Ticket
   

     I made this tag for a baby shower last week,  for my niece's sweet baby boy, Nathan.  I had previously made cards for Nathan and his parents, so I decided that a gift tag would be just right for the occasion.

This card also meets the requirements of a challenge on the Papertrey Ink forum, hosted by BethieJ.


I used three PTI dies for the tag - the Library Tag Card die forms the base and the Tag Sale #1 die was used for the stamped image. The border die Just the Ticket was used across the bottom of the tag.

The image is Gigi the Giraffe from Clear Dollar Stamps and has been coloured with copic markers in yellow and blue. (I used this image to make a little girl's birthday card in pink and yellow here - so sweet and easy to colour). 

    The sentiment is from the stamp set Just the Ticket. I added the tiny blue buttons to each side of the sentiment panel and tied them with yellow embroidery floss.


Card Details:
Stamps: Clear Dollar Stamps: Gigi the Giraffe;  PTI Just the Ticket
Inks: Memento Tuxedo Black; CTMH Moonstrck Blue
Papers: Recollections Blue card stock, gingham and dotted blue patterned paper
Other Supplies: PTI dies: Just the Ticket, Library Card, Tag Sale 1;  gingham ribbon; blue marker; small blue buttons; yellow embroidery floss.

Thanks for stopping by!!

Friday, October 15, 2010

Falling Leaves

     It's been another beautiful fall week here and the leaves are quickly falling from the trees. DH has been raking them, but they still keep coming!
     I received the new PTI stamp set Falling Leaves in my last order and finally got a chance to play with it. Originally I wanted to make a card using Nichole Heady's sample from the August 2010 release projects, but couldn't seem to make it work.... so this is my "version". 
   We went to visit my aunt and uncle last week - they live in a city 700 km  (about 450 miles) from here, so we don't see them often. My uncle has been living with terminal cancer for this past year and I wanted to send a card, just to let them know that I'm thinking of them.


     I started by stamping the tree trunk and tree topper three times, onto white card stock. I used Close to My Heart inks - Cranberry and Autumn Terracotta and Stampin'Up's More Mustard for the leaves. Text Style was stamped on top using PTI's Tea Dye ink cube: Chai, and then the edges of the card stock were distressed with Chamomile and Chai. I mounted the image panel on two layers of card stock - chocolate brown and autumn terracotta.- that had been punched with an EK Success border punch.
     The sentiment, from Vintage Picnic, was stamped with Autumn Terracotta onto a cream card stock and then mounted on a piece of Autumn Terracotta.  
     I had to place the sentiment on the left side because I made a mistake with my Text Style stamp right at that spot!! Has that ever happened to you??  Luckily I was able to "cover" it up and save the card! 
     Finally I added a few extra "falling leaves" with the single stamp included in the set and then outlined each leaf with a glitter pen, just to add a little bit of glitz!


The inside of the card uses a Clear Dollar Stamp set called "Baskets of Blessings" that I stamped and then coloured with markers. I wanted the inside to have a little colour too! I left some space on the right hand side to add a little note.

Card Details:
Stamps: PTI Falling Leaves, Vintage Picnic, Text Style; Clear Dollar Stamps Baskets of Blessings.
Papers: Kraft card stock, Autumn Terracotta, chocolate, white card stock
Inks: CTMH Black, Chocolate, Cranberry, Autumn Terracotta; SU More Mustard; PTI Chai, Chamomille.
Other Supplies: markers, Sukura clear Gelly Roll glitter pen; EK Success border punch; 

Have a Great Week-end!  Hope you have time for a little Stamping!!

Sunday, August 22, 2010

Sunshine, Rainbows & Kites

It's a hot sunny day here in Northwestern Ontario. We've had a lot of these days this month - we're not really used to high humidity - makes my hair very curly and kinky!! Oh well, I shouldn't complain, as the cold winds of fall and winter will soon be with us!!
Today I have two cards to share:

The first one has a cute little image from Clear Dollar Stamps - a little sun, a little cloud and a rainbow!!. This is the first time that I have tried a colour blocking technique and I really like how it looks. I'll have to try it again!!

The double sided paper from We R Memory Keepers has a whole series of matching designs. All the colours were on the same page in a colour block design with a distressed look which gave me the idea for this layout. I started with a green base, white card stock and  four squares in blue, yellow, red and green. The image was stamped, coloured and then cut out. I mounted it on top of another square of blue paper, mounted on white cardstock. The bottom rectangle is stamped with a sentiment from PTI's Up, Up & Away Sentiments. Three brads match the colours of the paper. 


I used more of the yellow paper on the inside and added a few strips of coloured paper for a 'rainbow' look.

Stamps:  Clear Dollar Stamps; PTI Up, Up & Away Sentiments.
Paper: We R Memory Keepers; Brazzill card stock
Ink: CTMH
Other Supplies: water colour pencils; brads; pop dots.


My second card is one that I made for my son's friend who just finished her residency at our local hospital. I used the kites from Up, Up & Away and the  "high five" sentiment was just right. 


The patterned papers are from the same line as the first card, but this time I used the colourful flowers as the background. All of the kites were stamped onto a white card stock and then stamped again on the coloured papers, cut out and mounted on top to give it a dimensional feel.

I 'sponged' the sky with CTMH Crystal Blue ink and then added a square scalloped mat. The ribbon, button and embroidery floss draws your attention to the paper flower and the sentiment at the bottom of the card.

I like the fact that I was able to get two totally different cards from the same paper, and still have some left over for another day!!

Stamps: PTI Up, Up & Away  and  Sentiments.
Paper: We R Memory Keepers; Brazzill card stock         Ink: CTMH
Other Supplies: nestabilities; dimensionals; ribbon; button; embroidery floss;  Stampin'Up Boho Blossom punch; corner rounder punch; markers.


Sunday, August 15, 2010

A New Adventure

Kenya Ketto and Sparkles
This is my first blog post.. a place where I can record all of my crafty endeavors. I'm not sure how often I will do this, as it is a steep learning curve for me.. computers are not my best friends!! We'll see how it goes.
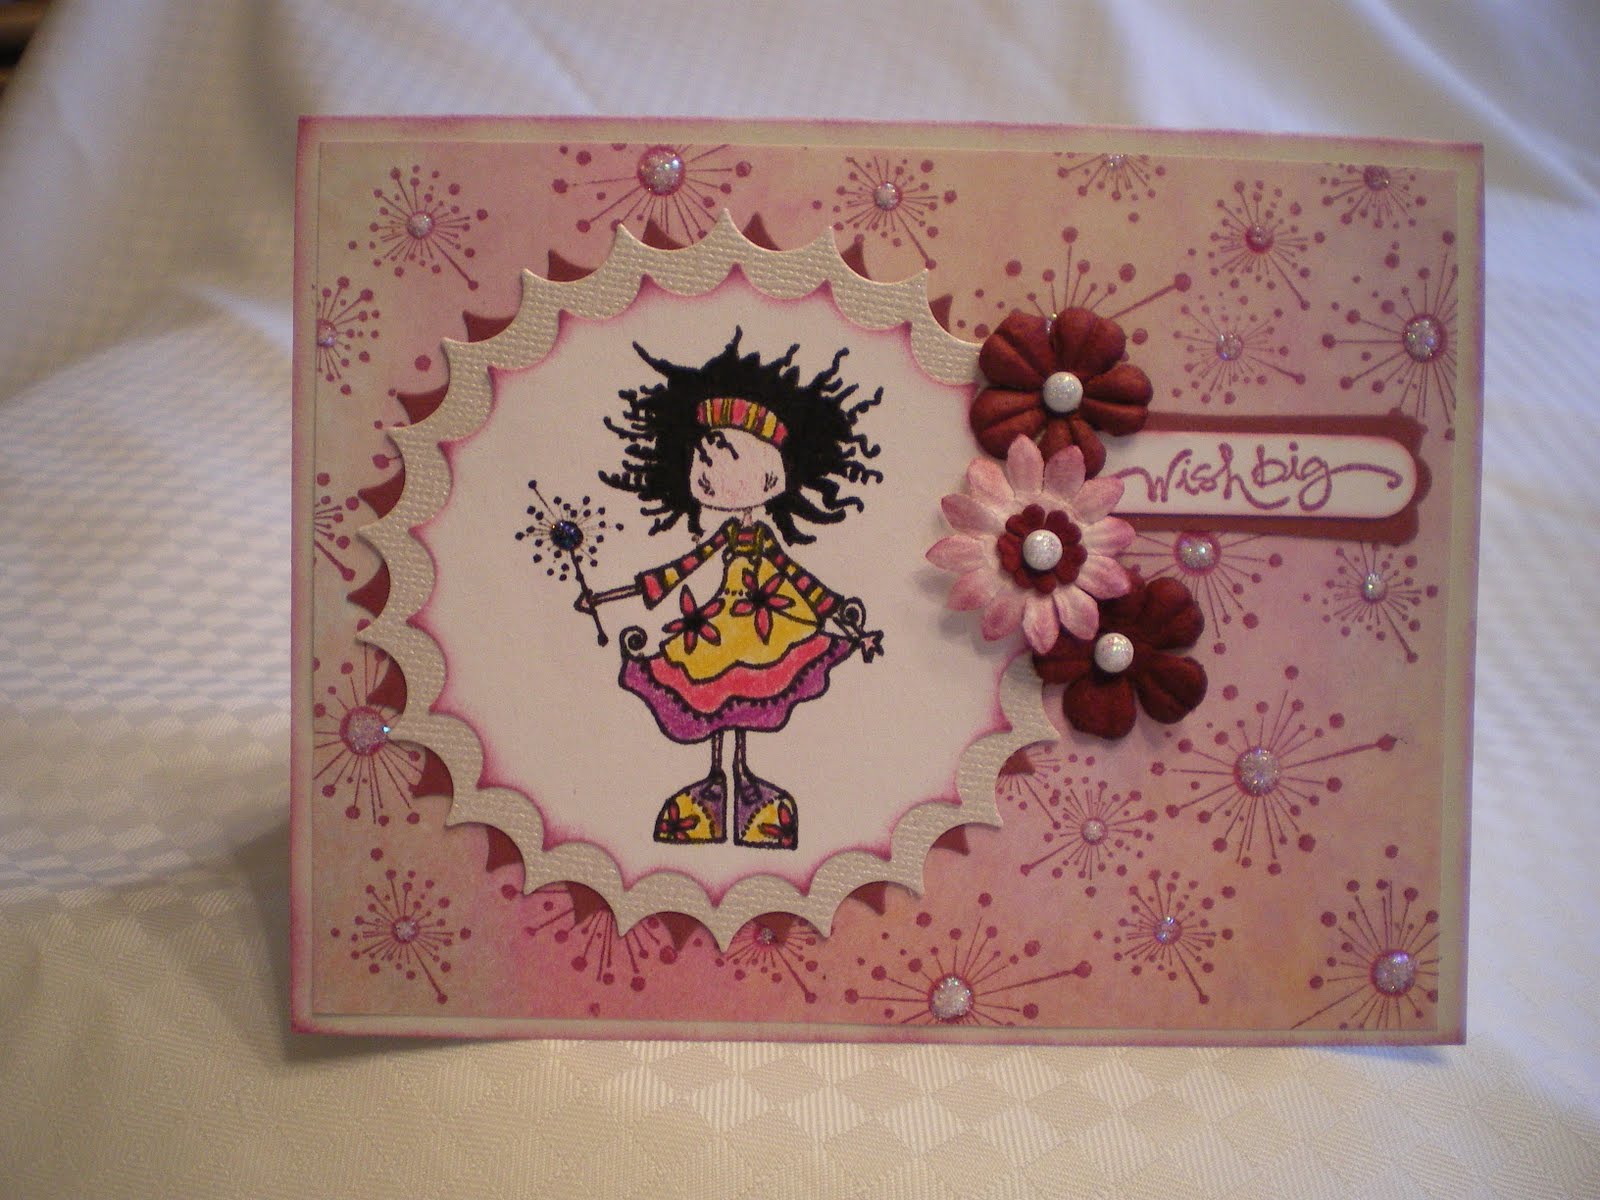
My first card is a Stamping Bella image that I got at my LSS - Dat's. I made this card for my niece's birthday last year. I really liked the "sparkle"stamps.. so I used them to make the background paper. Stickles were applied to the centers for added 'sparkle".


 The inside of the card uses a sentiment that I printed from the internet, matted and added to the card, along with another Kenya Sparkle!


Stamps: Stamping Bella; Sentiment: Stampin'Up
Supplies: Nestabilities, Stampin'Up punches, brads, flowers; water colour pencils.


I used a variety of stamps to make this card for my niece's daughter. "Gigi" the Giraffe is a Clear Dollar Stamp, that is so cute and fun to colour in yellow and pink!! The small circular sentiment is from Close to My Heart and then I added the "1st " from another CTMH stamp set and used  glitter around the image and on the number. Mini pink pearls and pink gingham ribbon finishes the "girly" card.
I used a strip of yellow paper on the inside, to stamp the sentiment, and then mounted it on the designer paper. Hip Hip Hooray was stamped on the DP and then added on the top. I really like how it turned out.

Stamps: Clear Dollar Stamps, Close to My Heart, Studio g
Supplies: Nestabilities,  water colour pencils, pearls, ribbon, glitter.