Welcome to my crafty blog... a "garden" of colourful cards, quilting, sewing projects, knitting...and what ever else happens along the way!!


Sunday, March 25, 2012

Papertrey Ink March 2012 Blog Hop Challenge


 Welcome Spring!! 
That's what this inspiration photo says to me!! 
Papertrey Ink has challenged us to make a project based 
on the colours and/or design  from  this site.  It's a warm &
sunny image called "Sunshine in a Box".  How fun!!


 Here's my card, using lots of these spring colours and goodies!
I think it could be called "Sunshine in a Basket" !!


I created a card using the colour scheme: Lemon Tart and Aqua Mist and
some of the patterns from the inspiration photo: polka dots and gingham.

I wanted to keep this post short, so I've just listed the card details below. If you wish further information, please leave your question in the comment section and I will respond.

Card Details: PTI (unless noted)
Picnic Basket = Vintage Picnic stamps and die; Polka Dot Parade Paper pack
Flowers = Friendship Jar: Spring Fillers; Copic markers; Sakura Gelly Roll pen
Butterfly/Trail = Sweet Spring;               Sentiment = Tag-Its #3
Lower Background = Background Basics: Gingham; Label Basics (double line)
Upper Background = Sponging technique: Spring Moss & Aqua Mist inks; Copic Markers 
Inks = Aqua Mist & Spring Moss; Memento Tuxedo Black; Close to My Heart Buttercup 
Card Stock = Lemon Tart, Aqua Mist;  Bella White    Other = Linen Impression Plate; Nestabilities Ovals & Big Scalloped Ovals;  yellow brads; small sunburst punch; My Mind's Eye Lime Twist "Together" Twine 


Inside Details:
Sentiment = Vintage Picnic Sentiments
Other = Clear Dollar Stamps:  Happy Rainbow; Copic markers


Thanks for visiting today. enjoy the rest of the Blog Hop!!
Karen C.

Saturday, March 17, 2012

Handmade Knit Scarf & Tag

I haven`t done any knitting since last spring, so I decided to tackle a really simple scarf for my sister-in-law`s birthday. I found some beautiful yarn at
my local knit shop:  Lampo - Allssandra Filate (polyamide/polyester blend).
It's a ribbon like yarn in a range of turquoise, blues and navy with shots of silver metallic slubs. 

I added a new pair of 6.5 mm Bamboo knitting needles and started knitting. 

I cast on 22 stitches and then knit it long enough so that it could 
be worn in a variety of ways. (The scarf measures 65` x  4`)

Once I finished I added a little gift tag/envelope and it was ready to wrap.

The `gift tag` is actually a little envelope I made using Papertrey Ink`s Tiny Envelope die. I cut it out of white card stock and then stamped Background Basics: Circles using my `new`Autumn Rose ink. I tucked the label from the yarn into the tiny envelope ..... this gives the fiber content and the care instructions for the finished scarf.

The label and image are both stamped with Close to My Heart`s Indian Corn Blue ink and stamps from Hand Knit (Stampin`Up).  The little ball of yarn and the knitting needles were stamped, coloured and then fussy cut and finally added to the front of the envelope with foam dimensional tape.  (I actually cut the little knitting needles out and then "slid" them into two slits that I made on the ball of yarn, so it looks like I'm in the middle of a knitting project!) 

A Little Helpful Hint for Knitters!!
I like to knit while I`m watching television, but it always bothers me when my yarn goes flying across the floor or underneath my chair when I pull on the ball to release more yarn. I've seen Yarn Bowls on various sites and thought they were a really neat idea. My husband suggested that I try putting it into a coffee can or large container to prevent the yarn from taking flight!!
Here`s what I came up with:

It was just the right size and it was free!!
(But I still like the decorative Yarn Bowls - maybe a birthday gift??)

When I finished knitting each day, I neatly tucked the scarf and my knitting needles into the container and they were kept clean and organized until I was ready to pick them up again. 

I am linking this to the Sew Darn Crafty Party at Sew Many Ways
Thanks for visiting today!!
Karen C.

Thursday, March 8, 2012

Ink & Card Stock Swatch Books

When I first started stamping several years ago, I faithfully created a "stamp book" as an inventory and reference. I have found it to be very helpful when I'm trying to decide on a sentiment and/or image I want to use on a card or photo album. I also created a set of PTI card stock swatches but always found it too small to be useful. (1 inch squares just didn't work for me!)

Recently, I decided to update by making a little 'flip book' for my card stock and then a second one for my growing ink collection. I used a number of ideas that Lisa Johnson suggested in this post.

In the past, I would take out all of my card stock packages in order to find the right colour and then try to find a colour of ink that would match.  I grouped the card stock and inks into colour families, so everything I have in the "green family" is together. With my new booklets I can see at a glance what colours I have and how they can work together.

Card Stock
When I first found Papertrey Ink, I purchased  a card stock sampler so that I could see the various colours. I also have a few packages of card stock from Stampin'Up, Close to My Heart and Michaels. I've included all of these in my book. 

Each page was die cut with PTI's Library Card Tag Die and labelled on the back with the company and colour name.

 In some cases I have purchased the matching colour of PTI's new ink formula, so I have stamped an image (Botanical Silhouettes) on the white label and on the coloured paper. This quickly shows me the coordinating colours that I have in my stash.

The front and back of the book is made with several layers of cardboard (from cereal boxes) and card stock. I decorated the front of the booklet by stamping the square block from Quilter's Sampler and then gluing squares of PTI card stock in various colours. The title was stamped with DJ Whimsy Alphabet (All Night Media). On one side I added CRAFT WORTHY (PTI: Button Boutique) and the date (PTI: Library Ledger and LL Additions)

On the inside of the booklet I stamped the sentiment PINK (C.C. Designs); chirpie KETTO  and dragonfly KETTO  (Stamping Bella).
On the back cover I added the image and names of the colours that came with my first PTI card stock sampler. I also stamped some butterflies (PTI: Butterfly Dreams) and polka dots with my 'new' PTI inks!!  I just received the newest card stock sampler, so will soon update with the additional colours.

I have also included a listing of all of the PTI colours with the Copic Trio markers. I have highlighted the copic markers that I already own, so it's easy to see if I have the right markers to recreate that hue when colouring an image. I can also use this to help make a list of markers that I will need to add in the future.

Inks
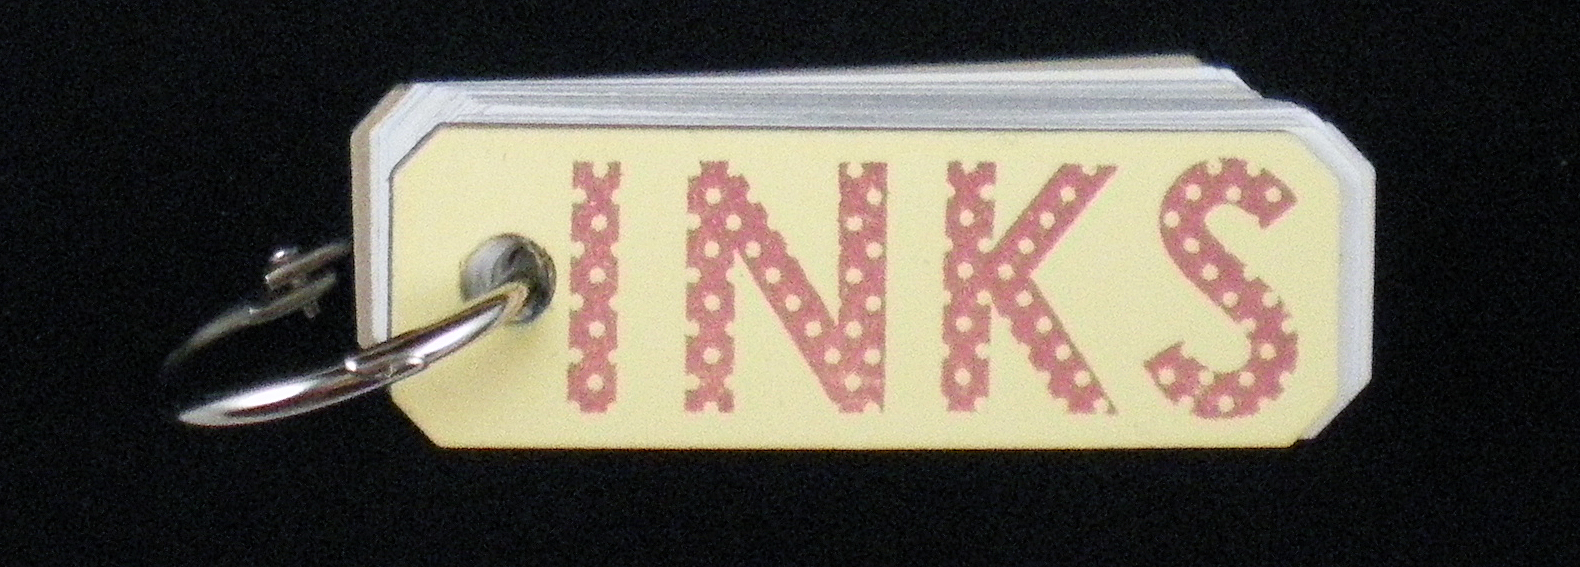
When I first purchased inks, I got a variety of pads and cubes from Close to My Heart. Over time I added a few more from Stampin'Up and Michaels. Since the new inks from PTI have been introduced, I have some of these in my stash as well.  I made this little flip booklet for all of my inks using the Angled Label Die from Label Basics. The front cover was stamped with CTMH Polka Dot Alphabet in PTI's Autumn Rose.

I labeled each stamped image with the company and the colour name. Now, when I'm looking for a colour match for patterned paper or card stock I can quickly pull out my ink swatches and check to see if I have a good match.

 I have some CTMH inks that are a fairly good match to the PTI card stock colours, so I will  continue to use these rather than purchase a new ink pad. (Orange from CTMH is a good match for PTI's Orange Zest).


 I'm so glad that I took the time to make these booklets. They sit on my desk now and are used regularly. They have saved me time and frustration when trying to coordinate ink and paper colours.

Thanks for visiting.
Karen C.